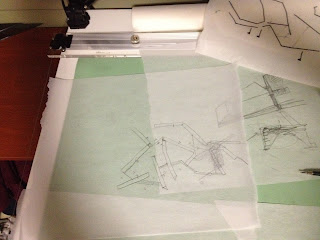
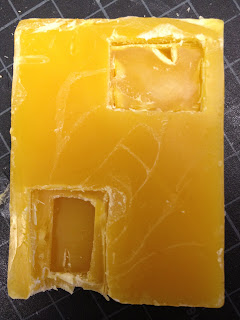
In progress. Still want to chisel in some texture. I tried incorporating wire, which semi worked. And you can in fact poor plaster into an already drying mold if you don't make enough the first time.
-a
Friday, May 4, 2012
Wednesday, May 2, 2012
alignment
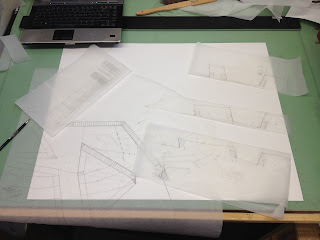
Two different layouts, just slightly adjusted, still missing some pieces. The difference are the small scale sections moving from the right to the left of an elevation to better relate to the place they are taken.
This is my favorite and I feel most descriptive drawing of physically what is happening with the cemetery.
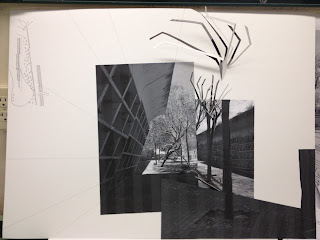
Perspective collage one! Purpose: show materiality.
-a
This is my favorite and I feel most descriptive drawing of physically what is happening with the cemetery.
Perspective collage one! Purpose: show materiality.
-a
Wednesday, April 25, 2012
after bifurcation
After drawing out different iterations of the plan, these are the graves I chose to definitely keep:
Dividing the left most space was still an issue, so I axonometrized the plan:
Each piece in question is in cardboard, to be later added to a model:
With the winning scheme being one that creates a new ceremonial space that is better organized and more intentional.:
I then added the ground, albeit a bit abstractly:
-a
accidental and unsuccessful space
I started exploring the accidental enclosed space and ways to divide it up.
And arrived at this:
And arrived at this:
I also explored what happens in section when the hills falls away and also when the paths slope down.
-a
Wednesday, April 18, 2012
affect
First attempt at plaster.
Pre Plaster
Mold
I was trying to figure out what happens at the top. The inverse of the actual grave plots (the bottom half) occurs on the otherwise plain top half. I followed the slope the hill...which I created...so I could recreate it and make it work better.
We talked about creating openings (removing some of the pop outs and being able to see completely through to the sky) and how that would affect the space.
Like this. Except not so ugly and not with an umbrella like piece over the top.
Another option is to make gashes in the top that relate different parts of the site to each other.
I'm currently drawing out the rest of the plan based on existing geometric relationships and angles, after which I will be exploring the site more in section to determine how the graves should meet the sky.
-a
Sunday, April 15, 2012
arithmetic
Just kidding. Geometries. Descriptive (I think?) geometries. No measuring involved!
Roberto taught us how to draw parallel and perpendicular lines without rulers. And we learned all about drawing tangencies and things. Not that it isn't helpful, but it would have been amazing to have this Day 1 of architecture school. However, now we can use it starting this semester!
The final drawing:
-a
Wednesday, April 11, 2012
(a) bifurcating drawing
Did what Luis suggested and took photos of different layouts:
1
2
3
4
5
I like the three sections branching off to the right. They have been spaced out more so they're not as cramped and on top of each other. Also, the whole drawing is meant to branch from the bottom left (like a tree) to the top right. Haven't decided on the final position of the elevation, but I'm leaning towards the bottom one. Here is the preliminary, undetailed drawing as of now:
-a
Tuesday, April 10, 2012
as is and accidents
Things that don't work:
Not modifying the lines of my initial tree diagram and using them "as is." Boring. Noneffective.
Shallow cuts! Go big, or go home. Because going slightly larger than small just doesn't work. Looks like an accident, and not a happy one.
Trying to glue additional pieces onto a cardboard site just to see...better just to redo it. However, from this one, I learned that the hill needed to be built up more. This is a partially rebuilt hill.
-a
alterations
I'm using the basic tree drawing I have (that has been the basis of everything) as the design of the carving. I drew it based off of the back of one of my drawdels:
(This is the front.)
(This is the back.)
-a
Monday, March 5, 2012
annoying
So who knew that we could actually produce drawdels and drawings without paper that looked good. Kind of daunting when we first saw pictures.
The section/plan in perspective/photo collage went through a couple itterations before it emerged as its current state.
It started out as one photo. Not collaged. Just cut through with the section lines. But, that was too simple and easy.
So then, I started coloring the section lines black and altering their thicknesses to emphasize different parts. However, the lines looked sloppy. So that was another no.
This happened instead. A collage of photos to make one space with all important lines cut from it in plan and section. All of the line weights are the same. Hand drawn on the rest of the sheet are the remaining lines of the plan (i.e. topography lines). I'm happy with how it turned out.
The wire was probably the physically hardest thing to deal with. Since it's packaged in a spool, it has a tendancy to return to its round state. Unfortnately, I wanted it straight.
It started out a mess. Believe it or not, those lines actually do mean something.
The end product is an axon drawing of part of the site. Still challenging to get it to bend the way I want it to.
Moving on to the other drawdel. It's an emphasis on the trees that are in the area I chose and how they change the space.
For reference, the plan is drawn in the top left with all trees marked with an "x."
Finally, we get to the wax drawing without paper.
First of all, wax is awesome to watch melt. Slow. But awesome.
Step one: make a mold. Fill it in ONE POUR. Otherwise it is lumpy:
Step two: peel away the sides!
Woo! Looks so clean and perfect, right?
Step three: peel away the rest! Should be easy, since the sides were just a piece of cake.
...
Ok, so we try with lots of little molds with different combinations of foam core, hot glue, Elmers, cooking spray, canola oil, etc.
Clearly, most of the trials were unsuccessful. What is bad about wax is that you can NOT leave pieces of glue or foam core or whatever attached to the wax before you remelt it. Because they will be forever in your pan of wax. Annoying.
The winning combination: hot glue that does not leak out the sides to build the mold, smother all cracks and edges with Elmers glue and let it dry completely. Bathroom hand driers are phenomenal for those of us who are impatient. Finally, spray the whole thing with cooking spray.
Voila!
-a
-a
Subscribe to:
Comments (Atom)


